ARM DesignStart case study demonstrates scheme’s ease-of-use
The ARM DesignStart program offers a fast, cost-effective way of getting projects to proof-of-concept stage and even to actual silicon. It is particularly useful for companies that have analog-and-mixed-signal design experience but are far less knowledgeable about digital and need to get a project underway quickly at minimal NRE.
But though the IP and supporting tools have been available free-of-charge for some time, a new White Paper now aims to demonstrate how easy DesignStart is to harness by way of a case study.
Inside ARM DesignStart
The core DesignStart offering comprises free access to ARM’s Cortex-M0 and Cortex-M3 32-bit processors – respectively the company’s smallest and its most popular embedded CPUs – as well their system IP. Users can configure and modify subsystems as required and add their own IP.
Alongside this, a number of ARM’s EDA partners provide free access to appropriate tools. Among these is Mentor, which offers a 30-day evaluation license for its Tanner EDA mixed-signal flow, including S-Edit for schematic capture, T-Spice for analog simulation and ModelSim for digital behavioral simulation.
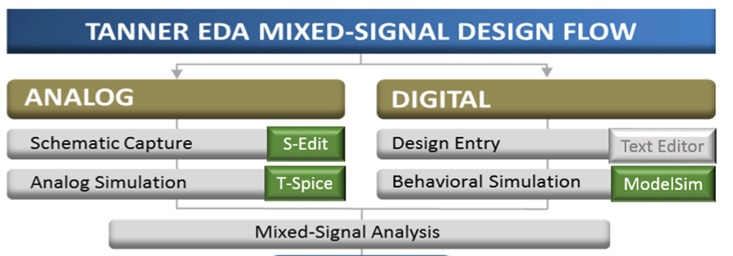
Figure 1. The Tanner evaluation flow for ARM DesignStart
The DesignStart Eval package will take a proof-of-concept through to FPGA prototype free-of-charge. The DesignStart Pro package is free-of-charge up to the point where a company starts to ship silicon, after which a royalty applies.
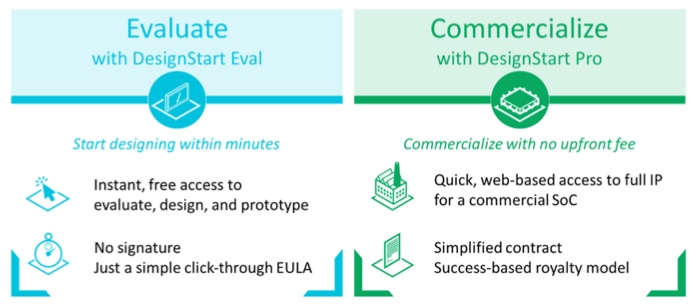
Figure 2. The ARM DesignStart Eval and Pro packages compared.
Putting it together
The new jointly-authored ARM/Mentor White Paper describes the combined DesignStart/Tanner technologies in more detail and takes the reader through a proof-of-concept project.
The case study is based on a sensor that a design house wants to connect to an 8-bit analog-to-digital converter and then on to either an M-0 or an M-3.
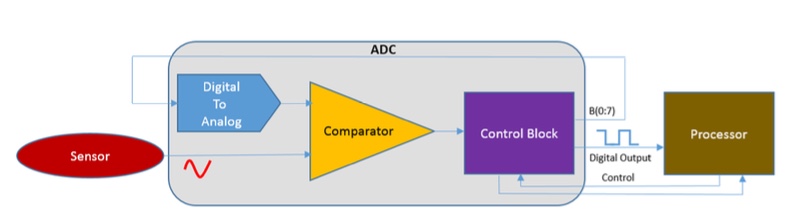
Figure 3. The case study design connects a sensor to an ADC to a Cortex CPU.
The article breaks down the design and simulation flow into four core stages:
- Creating the interface.
- Plugging the peripheral into the MCU system.
- Writing the software.
- Simulating the design.
The idea is to show how extremely straightforward it is to work within ARM DesignStart, and it is therefore a valuable primer for companies looking at how to proceed towards a prototype for, say, the Internet of Things.
“Fast SoC Proof-of-Concept with ARM DesignStart” is available for download now.